


How to improve lashing techniques for beginners?
Congratulations! You’ve just taken a step into a whole new world… eyelash extensions! Now that you’ve started to dabble in some of the basics of eyelash extensions and training, how can we improve some of our newly learned lashing techniques? Nothing comes easy and practice always makes perfect. In this blog article, you’ll find helpful tips and tricks to assist beginner lash techs to improve their lashing techniques so you can lash more effectively and efficiently
Prepare for the eyelash extensions lashing time

Prepare all the essential tools for the lashing procedure
One thing that really helps is to keep your space organized and ready for the day. It’s so important to have your lash items in quick reach so that you do not have to get up and waste valuable time lashing and you won’t be touching or rummaging through unnecessary piles and possibly transferring any bacteria onto your lashing surface. A lot of lash techs use a mobile cart to store all of their items to have easier access while lashing. There are many different variations of this on Amazon or Ikea. You would choose the one that best fits your decor and space.
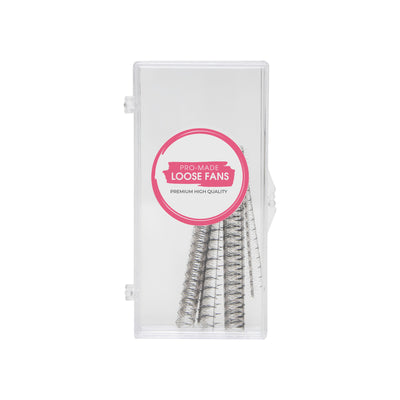
Also, having your items prepared beforehand can help immensely speed up your lashing process. Laying out all of your tools, pre-making your fans (if you’re doing volume) or placing your promades on a lash tile can save you so much time during your appointment. What some lash techs do is they pre-make their fans an hour or two before their appointment or the evening before a long day of clients (time-permitting, of course) and they store them in containers to be used at a later time. Being well-prepared beforehand sets you up for success in many ways. It alleviates a lot of unnecessary stress on yourself so it doesn’t leave you scrambling minutes before an appointment. It also shows your upcoming client that you take your time and you show great pride and professionalism in your work.
What about us? The lash artists? It’s important that we as lash artists prepare mentally and service our needs beforehand so it doesn’t become a problem during an appointment with a client. Don’t forget to eat, use the bathroom and have a decent amount of sleep before a lash appointment so that you’re not getting up during the time you should be focusing on lashing your client. When our needs are fully met, we can focus our time and energy on what matters most...YOUR CLIENT! :)
Avoid common mistakes of lashing techniques

Some common mistakes that beginner lash techs make can vary from one thing to another. Using glue that isn’t optimal for your environment can surely take up time during your lash appointment if you’re constantly having to re-apply lashes because they aren’t adhering to the natural eyelash. In this instance, it is important to have a hygrometer on hand which reads the temperature and humidity in the room. You would then base your lash glue purchase on what the readings on your hygrometer were.

Check out our hygrometer
After some time and experience, it might be helpful to have two types of glue on-hand for you to use in case there is a sudden change of temperature or humidity in your room.
Another mistake some lash artists do would be using the wrong weight, size, and/or diameter of lash extensions on a client.
All the natural lashes come in different sizes, shapes (curly, pointing downwards, etc.) so it is extremely important to always assess the state of a client’s natural lashes in order to best determine which length and weight would be suitable for the client. It is also important to remember the cycle of natural lashes as this will be helpful in determining which of your client’s natural lashes can be lashed or not.

For classic lash extensions, you would attach ONE lash extension to ONE natural lash. The weight of classic lash extensions can range from 0.10-0.25 with 0.10 being one of the lightest lashes and 0.25 being quite heavy. Upon inspection of the client’s natural lashes, you notice they are quite thick and strong. This means their natural lash will be able to withstand placing an eyelash extension with a heavier weight, possibly a 0.15. If you see their lashes are quite thin or brittle you may want to choose an eyelash extension that is lighter (0.12) or if your client’s natural eyelashes look too weak, he/she may not be a good candidate for eyelash extensions at the moment and may have to use an eyelash growth serum.

SELF-CARE is so important. Some lash artists tend to forget that when they begin taking on clients. We are so excited to start lashing and creating such beautiful sets that we sometimes forget to take care of ourselves too. One would consider this a beginner's mistake as well because it could potentially harm you in the long run with being burnt out, getting sick, etc. It is imperative that we take care of ourselves as artists and not bombard ourselves with working long hours with back-to-back clients. So let’s take our time, and pace ourselves so that we can be the best versions of ourselves while we serve our clients.
Provide good lashing techniques with the right tweezers

As an emerging lash artist, we can become overwhelmed with the number of lash products out there on the internet and what we see on social media, etc. But it's important that we do our research to see what products will work best for us. When lashing, it’s important that we have the right tweezers that help us get the job done and what they are used for.
Everyone is different and learns in different ways. For example, some people prefer using a straight isolation tweezer, while others prefer using a curved isolation tweezer. The best way to find the right tweezers is to try them and see how you feel about them. You will definitely feel more comfortable using a type of tweezer. You can either go to a local lash supplies store and see if they can let you try the tweezers, or find a lash company on the internet allowing you to return the products if you aren’t satisfied with them. This will allow you to try a bunch of tweezers and figure out which are the best fit for you.
Do not forget every tweezer is different, and they all have a different right spot. Make sure to read our article to figure out where the sweet spot of your tweezer is! This will allow you to grab your lash efficiently without wasting time and your lashes!

Isolation tweezers are used to push apart surrounding natural lashes and isolate one natural lash and to place the lash extension on top of it. There are different types of isolation tweezers such as LLBA Professional’s straight isolation tweezers “Move It” and “La Classique”. They also carry curved isolation tweezers such as “Lashy & Classy”. With time and experience, you will learn which tweezers work best for you. Some lash artists even use tweezers that some would use for volume as isolation tweezers.
Placement/Pick-up/Fanning Tweezers
These types of tweezers can be used for a variety of things during a lash appointment just as the sub-header states. But, it is important to make sure that if you are using a tweezer to make fans for volume lashes, it’s important to find the “sweet spot”. The sweet spot is referring to a spot on the tweezer where once you pick up a bunch of lashes, it is easy to fan-out consistently without any lash extensions falling out.
Some examples of fanning tweezers from LLBA Professional are Oohlalashy, Give me the D, Baby Booty. Again, it all boils down to your preference as a lash artist and how comfortable each tool fits in your hand.
Prepare for eyelash extensions pre and post-treatment

We’ve learned that clean natural lashes are a must before getting eyelash extensions done. Clean lashes help eyelash extensions to adhere to the natural lash more effectively. Kindly ask your clients to come with clean lashes and always inspect them before starting the lash set. If you notice that there is still some leftover make-up, residue, etc., advise your client that you will need to give them a lash bath and just explain the importance of why you’re doing it. Clients will appreciate you more once you tell them that clean lashes lead to better adhesion to the natural lashes thus in turn, possibly longer time in-between fills.
A great way to clean the lashes would be using the LLBA Professional bath solution and rinse the foam away with saline solution (contact solution, you can buy it at the drug store or on Amazon), and fan the natural lashes dry. Do one more quick inspection of the natural lashes...then you’re ready to start lashing!
Sometimes, a client has a really oily lash line that transfers onto the natural lashes. If you’re finding that even with a lash bath the client is still visibly oily, definitely prime the lashes.
After you’ve completed your lash set, it’s always important to seal off your sets with some sort of bonder. A bonder helps cure the lash glue quicker so your client isn’t left with wet glue even if you’ve dried their lashes with a fan. LLBA Professional carries "Superbonder" by Ruthie Belle which is a great bonder to finish off your sets. The way you would apply the bonder:
- After the set is finished, wait two minutes and let the lashes air-dry.
- Take your Superbonder and squeeze one drop onto two micro applicators. One drop is MORE than enough.
- Swipe the two micro applicators, with one on the top of the lashes and the other towards the bottom, and go from the inner corner to the outer corner.
- Dry the lashes with a fan for two minutes and you’re good to go!
As always, it is important to educate and encourage your client to keep their lash extensions in the best possible shape. This means, cleaning their lash extensions daily with extension-safe lash soap, not wearing any make-up, and avoiding any oily face products near the eye area.
For lashing techniques, practice makes perfect

With time, your skills as a lash artist will continue to grow and flourish. Use every opportunity you can to learn from previous mistakes or if you want to try something new. Everyone starts somewhere so don’t feel as if your sets need to look beautiful right away. We all learn at different speeds so take it easy on yourself. If you feel like you’re struggling with a certain technique or you need advice, there are so many eyelash extension groups on Facebook that answer questions, they post tips and tricks and other useful information that can help you as a lash artist. Another way to hone your craft is to take refresher courses to keep you up-to-date on new and current techniques. The more you learn, the more you’ll be able to pinpoint what your strengths are and use that to your advantage as a lash tech.
Finally, as a new lash artist, following these tips can help you navigate through your newfound career in the beauty industry. Don’t be afraid to reach out to other fellow lash techs for advice to help hone your craft. Their feedback can help improve your techniques and you can also learn a few new tricks down the road. You will only get better once you start! So keep on going!
Share this
Popular posts


Leave a comment